
Arriving home, putting the Red Chev away for the day, I ventured out a few hours later, fired her up, and detected a miss, mainly on idle. A compression test lead me to suspect a burnt out exhaust valve in no 2 cylinder. Compression readings were 55-30-55-60, not healthy at all. So there was nothing else to do except strip off the head, check out the damage, and hope the bottom end of the engine is OK.
My plan was to put on another head, not necessary in prime condition, but with valves lapped in so I could check the compression and ascertain what condition the rings and pistons where in.
Why? Well I did not want to go to the trouble of installing a recod head only to find troubles down below and have to strip it out again. The head I fitted was worked on by me back in the early 70's when I was at night school. It had been surface ground, valves reground and lapped into re cut seats, but they were second hand valves, with a bit of play in the valve guides. Still it would be enough to verify the compression across all cylinders. And as insurance I was having the original head reconditioned at the same time.
I was cautious or did not want to do unnecessary work, so at each stage of reassembly I only did enough to get a result at that stage, for example the first compression test was done with no manifolds connected, only rockers and push rods. More about that later, but basically the process involved the following steps.
1. The head was removed, and I confirmed that at least 2 exhaust valves were burnt out.
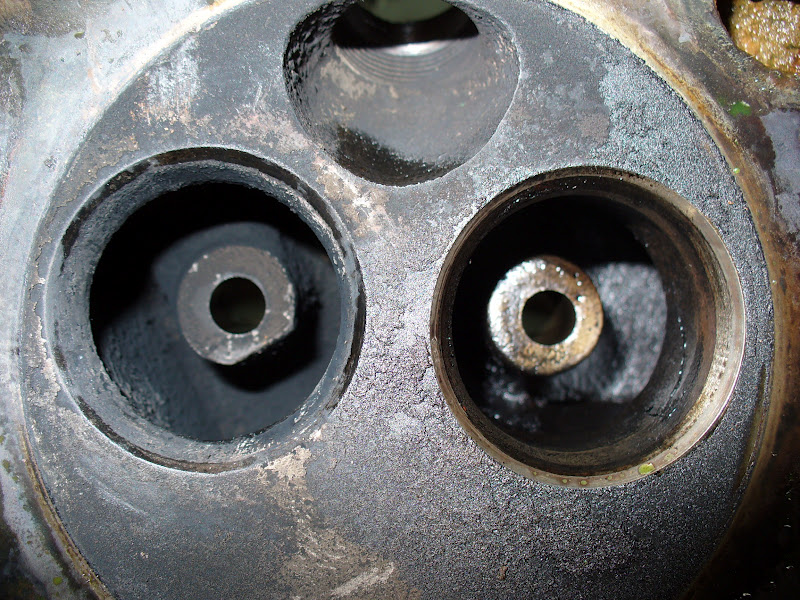
2. The combustion area of the cylinder bore and pistons were cleaned of as much carbon as I could get to, and any suspect marks or areas of the cylinder bores were very lightly cleaned up with either scotch brite or wet and dry.
3. There was more rust in the block water jacks than I was happy with, so after a bit of sealing bores with duct tape and fitting a blank plate where the water pump bolts to, I filled the block water jackets with Rust Buster and let that cook for about 48 hours. After this the block was flushed out with a Gerni. The results were excellent. Not a trace of rust or flaking debris. That was all flushed out. All this was done with the engine still in the car, and the inlet and exhaust manifolds still hanging around, waiting for a head to latch onto.
4. The next step was to replace the head bolts with studs which were fitted into the block after the holes had been cleaned out with a series of taps. The studs were coated with never seize, screwed in till they bottomed out, then backed off a turn. The benefits of studs against head bolts is they allow you to refit the head right the first time, not sliding around locating the holes, and as important being made of a modern hi tensile steel with a finer thread at the top, torquing down the head can be more accurately controlled.
5. A new head gasket was fitted after it had been coated with silver frost on both sides.
6. The head was fitted and torqued to 40 lbs and the engine was run with no coolant till 160 F was reached at the rear of the head, shut down and the head was re torqued at 40 lbs and allowed to cool.
7. The engine was run with no coolant till 160 F was reached at the rear of the head, shut down and the head was re torqued to 50 lbs and allowed to cool.
8. The engine was run with no coolant till 160 F was reached at the rear of the head, shut down and the head was re torqued to 60 lbs and allowed to cool.
9. The cooling system was filled, engine run to operating temperature, shut down and re torqued to 60 lbs.
10. Compression test was done with results all cylinders around 62 to 65 psi, which is the most even readings I have had for approx 3 years. After checking radiator for any compression bubbles I was happy to make the decision to fully assemble the engine and run with the head I had fitted for testing, and keep the recod head in the spares cupboard for another day. Who knows I may get 6 weeks, 6 months or 6 years out of it, but I am happy to take a chance.
11. After an oil and filter change, and resetting the valve clearances, the Red Chev went for a test drive. Power was up, the engine ran smooth, no missing, no overheating, no water usage.
Had I been a sceptic that it would work so well. You bet I was. And it was no coincidence that I refilled the cooling system with water and not the super dooper green coolant I normally use at $45 a fill. That will be done one night this week.
Seriously it was a pleasant surprise that the engine runs so well with a head that was installed for test purposes only. How long will it last, well who knows?????
Below is a series of photos with a brief description.
Off comes the exhaust and inlet manifolds.

Off with the rocker gear

Off with the side plates

This is my pride and joy scattered across the bench


No prizes for guessing the exhaust valves.


Same thing with the seats


Now this is looking a bit better, brightness back into the bores and pistons

Top of the block was very lightly cleaned up with scotchbrite and fine wet and dry

New studs are fitted, and you will notice no more rust in the water jackets.

Used the opportunity to remove and clean the lifters. You will see the texta mark on the top of the studs. This allowed me to make sure they did not rotate and bottom out when re torquing the head.

While all the above was going on I had to deal with very rusted water jackets in the test head. When I did the night school reco back in the 70's there was no thought given to treating the rust. So 35 plus years later it comes back to bit me on the bum. Initially I stood the head on its edge with the water outlet facing up, covered all the water holes with several layers of duct tape and filled the water jacket with rust buster. Unfortunately this failed after about 2 hours, only one thing to do at short notice, and that's throw the whole head into rust buster. If I had my time again would not have done that as I had to spend a few hours re lapping the valves as the seats were slightly pitted from the process. Next time I would use a blanking plate on the head surface with a bit of sealant etc.
But and there is always a but, the head does not have a trace of rust any where. The amount of muck and rust flakes that the Gerni flushed out was considerable.
Below are a few shots of the head cooking away in Rust Buster.


Waiting to be assaulted by an angry Gerni

Same again

Waiting their turn for a clean up, valves and springs.

The final step, all assembled, ready to roll.


And if needed at some time in the future, I have this little baby tucked away.

You can see a crack repair I did back in 73 using the drill and plug method, still going strong.


Great effort Ray, All looks as good as new again so fingers crossed and I hope you get years of service out of that lovely old engine now
ReplyDeleteHallo Ray,
ReplyDeleteI have been following your and Grant's blogs for a while now, with great interest. I am also a long term 28 Chev owner. I bought mine at the age of 17 in 1970, although my Chev has never been on the road. It has spent most of the time on blocks and needs a great deal of work before it is road worthy. Your blogs have recindled my interest. My car is a combination of three cars, body and bits an pieces from two 27 Capitals and frame, running gear and cowl from a 28 National. The bodies, rear of the cowl, are interchangable. There may be some differences but none that are noticable.
You have a great deal of interesting and valuable information in your blog. My mechanical knowledge is lacking so I'm sure the information in your blog will be a great help as I begin my journey.
Regards
Charles Brennan
Dubbo
Hi Charles,
DeleteThanks for the kind words. Any time I can be of any help drop me a line.
We all share the love of these old contraptions.
Cheers
Ray
Ray,
DeleteYou are simply amazing, not just because you know so much about these old antiques (an you are one yourself), but because you are so willing to share that wealth of knowledge with anyone (even me). When I grow up, I want to be just like you! Hey, hey, hey.
Jerry
hi ray my name is ray too own a 26 ute and 27 chev capitol which is being restored now chassis done wood next and are watchin your storys and lovin it could you tell me what timber you used on the uprights in the cowl please?+ will post pics of my progress and thank you for your amazing effort in documenting this process theres nuthin else on the internet like this thanks again RAY MUNGO MAN from the the man shed burringbar saw chitty bang when i was young and became cractuss potts ?
ReplyDeleteHi Ray,
ReplyDeleteA good Hardwood is the first choice, the type depends on where you are. It should be kiln dried so it wont move or shrink too much. My friend Grant was very particular and used a local timber from the Gippsland area. In my case I used whatever hardwood was around. Remembering to apply some type of sealing, oiling or preservative will do the job, as they never get much water inside.
I hope that helps, but please ask more questions if you need answers.
Regards
Ray